Monitor APIs via AWS Lambda and Cloudwatch
In this blog, we will create a script in AWS Lambda function which check the API status and send the mail to the recipient via AWS SES.
Step 1: Open you AWS account.
Step 2: Open IAM service console.
Step 3: Create IAM policy for an IAM Role.
- Copy the below policy and paste it in your IAM policy.
 1{
 2    "Version": "2012-10-17",
 3    "Statement": [
 4        {
 5            "Sid": "VisualEditor0",
 6            "Effect": "Allow",
 7            "Action": "logs:*",
 8            "Resource": "arn:aws:logs:*:*:log-group:*:log-stream:*"
 9        },
10        {
11            "Sid": "VisualEditor1",
12            "Effect": "Allow",
13            "Action": [
14				"ses:*",
15                "logs:*"
16            ],
17            "Resource": [
18                "arn:aws:s3:::*",
19                "arn:aws:logs:*:*:log-group:*"
20            ]
21        }
22    ]
23}
Note: To know how to create a custom IAM policy , Please follow this link
Step 4: Create IAM Role and Attach the above IAM policy.
Note: To know how to create IAM Role, Please follow the this link
Step 5: Open Lambda console.
Step 6: Create Lambda Function.
To create an Lambda Function, Go to Lambda service from AWS console and create a new Function.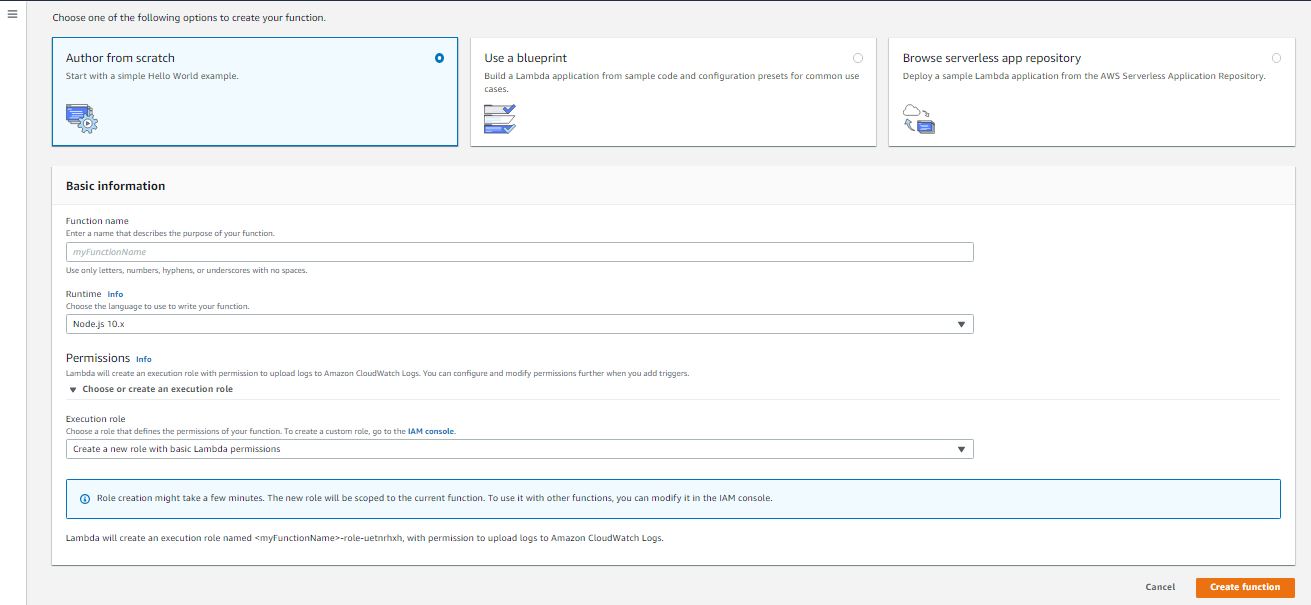
- Add Lambda Function name. (You can write any name).
- In Runtime info, Choose "Python 3.8".
- In permission, Choose "Use an existing Role" in Execution Role
- In Existing Role, choose the IAM role which you have create above for this Lambda Function.
- Click on "Create Function".
- Go to "Function Code" and Paste the below Python code in it.
 1import json
 2import os
 3import urllib3
 4import boto3
 5
 6SESclient = boto3.client('ses',region_name='ap-south-1')
 7
 8def lambda_handler(event, context):
 9    http = urllib3.PoolManager()
10    r = http.request('GET', '<url>')
11    r.data
12    webStatus = r.status
13    #print (r.data)
14    if webStatus == 200 :
15       print ("Website is UP")
16    else :
17        print ("Website is Down with status code: "+ str(webStatus))
18        response = SESclient.send_email(
19            Destination={
20                'ToAddresses': ['test@gmail.com','test1@gmail.com'],
21            },
22            Message={
23                'Body': {
24                    'Text': {
25                        'Charset': 'UTF-8',
26                        'Data': "Website is down with Status Code : " + str(webStatus) + " ." ,
27                    },
28                },
29                'Subject': {
30                    'Charset': 'UTF-8',
31                    'Data': 'Important Alert: Website is Down (URL name)',
32                },
33            },
34            Source='sender@gmail.com',
35         )
36
Note: Don't forget to change the service region, API url, recipient and sender email ID.
Step 5: Save the Lambda Function and Test the same.
Step 6: If you want to enable continous monitoring, Configure the same lambda in Cloudwatch event.
Step 7: Create Cloudwatch Scheduler and attached the Lambda Function.
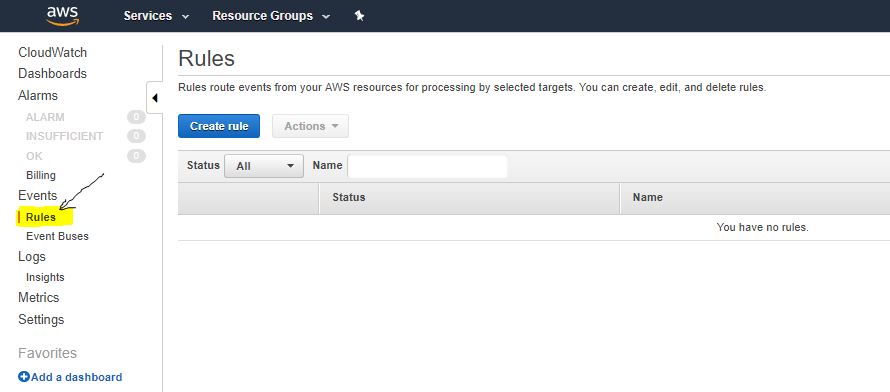
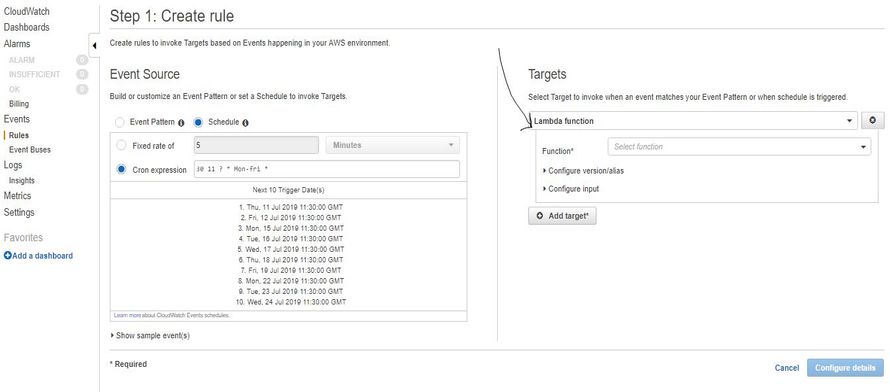
- To configure the scheduler, Open CloudWatch Service and Click on the Rules menu, present in the Left side of your AWS console.
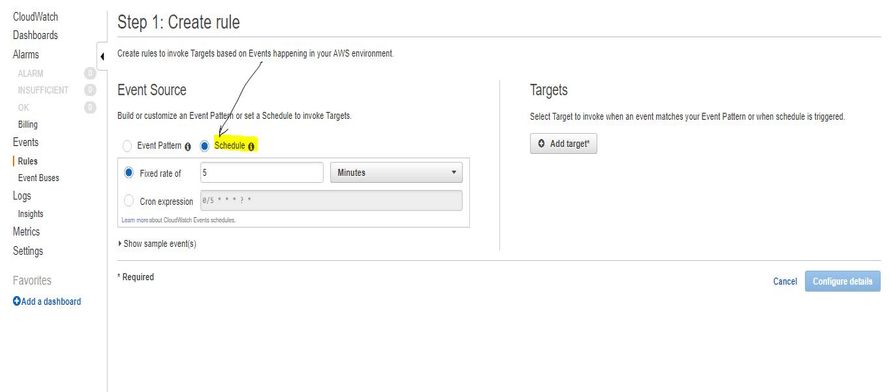
- Click in Create Rule and Select schedule from the Event Source.
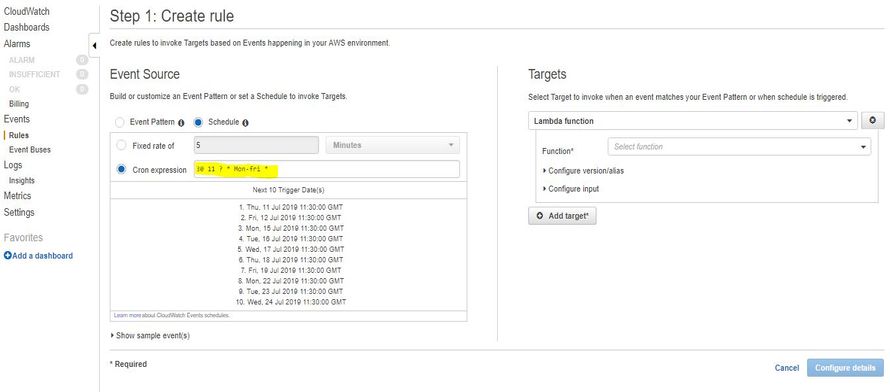
- Select the Cron expression and Enter the Timing (It will run every 1 min.) :
1* * * * ? *
Note: Time in CloudWatch is in GMT. You have to check only to convert IST into GMT. You can use this link to convert the time from IST to GMT.
Also, Use this link to learn more about the CloudWatch cron format.
- Select the Lambda function in Targets and select your function from the drop-down menu.
- Last, enter the Rule name , the description and check the Enabled state check-box.
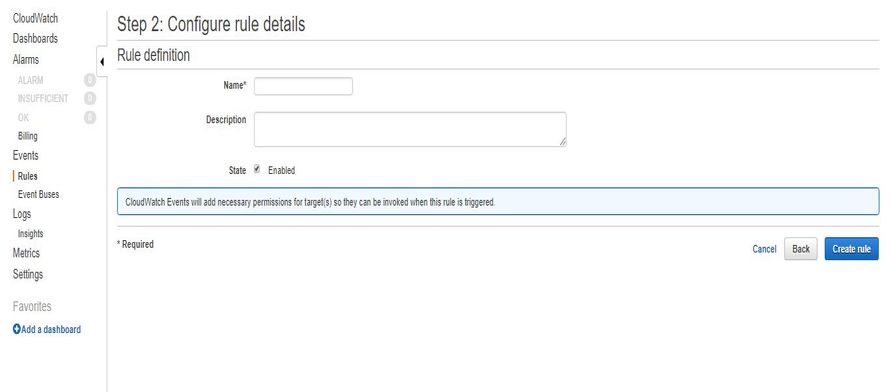
- Now Click on Create rule to complete the step.
Note: Please note all service should be in the same region.
Step 8: Shit relaxed, Your Scheduler will triggered the lambda in every 1 min and monitor the API.
Step 9: Please don't forget to share the post with your friend.